Tuesday, July 31, 2012

Hallowed Bones book review

Hallowed Bones (Sarah Booth Delaney, #5)Hallowed Bones by Carolyn Haines

My rating: 5 of 5 stars


I thought this was the first book of the series, but it was really the 5th! However, it was not too hard to understand the characters and the story. Sarah Booth is the main character (and I remember her name because EVERY character calls her that. It is very annoying) who lives in a grand house in Mississippi with her dog and resident ghost, Tilly. Tilly was a little creepy because she knew what was going on outside of the house. Sarah, her friend Tilly and a few other characters help investigate the murder of an infant whose mother, a healer named Doreen, is accused of killing her.

It was an interesting mystery, and the ending was great. The characters are written with different voices, but every one is good looking! There is even a bit of a love triangle. While there are lot of characters and a lot of storylines, it was not confusing. I am definitely going to to be reading the other books in this series.


View all my reviews


Monday, July 30, 2012

Menu Plan Monday - Week of 7/30/12


Where did this last week go? It is almost August too!! So crazy! just over 2 weeks until our WDW vacation... cannot wait!!!

Monday: leftover Pizza Casserole
Tuesday:  Hopefully Cheesecake factory for half price cheesecake!
Wednesday: Stovetop Mac and Cheese
Thursday:  leftover mac and cheese
Friday:  Something from the freezer.... or maybe crock pot. IDK, too tired to think!!

I do not cook on weekends!

The cookies I ended up making Soft Cinnamon Cookies using leftover cream cheese icing from Jeff's cake, cookies were good, but the icing is divine!!!

IDK if I'll bake this week or not.

for more menus, visit orgjunkie.com

Saturday, July 28, 2012

Diamond Candles Giveaway Sign Ups

Who doesn't love diamonds? Many readers have requested a worldwide Diamond Candle Giveaway and so Starting August 3rd, Rita Reviews along with some blogger friends, will be hosting a Diamond Candle Bonanza Giveaway Event. We will be giving away a set of 5 Diamond Candles ($100 Value!) Diamond Candles are these really cool earth-friendly soy candles that are made in the USA and contain a surprise in them. You see, in each candle there is a ring worth anything from $10 to $5,000! That's right, you could have a diamond ring worth $5,000 inside of your candle! So mark your calendars, you don't want to miss it! If you are a blogger and want to participate in this event and potentially earn thousands of new followers, you can sign up HERE

Please tell them that LBandJ sent you! :)

Friday, July 27, 2012

Daring Bakers' July 2012 Challenge: Crackers

Our July 2012 Daring Bakers’ Host was Dana McFarland and she challenged us to make homemade crackers! Dana showed us some techniques for making crackers and encouraged to use our creativity to make each cracker our own by using ingredients we love.

I really enjoyed making crackers!  They were SO easy to make! They are time consuming to bake but worth it!

For these crackers, I would make more of the topping. It was SO GOOD, sweet more than spicy, but I used it all sparingly and still ran out.

Monterrey Jack and Oregano Crackers 

(Roll with pasta rollers or by hand):

Servings: Approximately 80 crackers

Ingredients

1⅔ cups (400 ml) (235 gm) (8¼ oz) all-purpose (plain) flour
2¼ cups (540 ml) (225 gm/8 oz) grated Monterrey Jack cheese, firmly packed
2 teaspoons (10 ml) (1 gm) dried oregano
½ teaspoon (2½ ml) (3 gm) salt
½ teaspoon (2½ ml) (½ gm) black pepper
½ cup (120 ml) (4 fl oz) vegetable oil
½ cup (120 ml) (4 fl oz) water

Spice topping

¼ teaspoon (1¼ ml) (1/8 gm) cayenne (or chili powder)
1 teaspoon (5 ml) (3 gm) kosher salt
1 teaspoon (5 ml) (5 gm) sugar

Directions:

1. Combine the spice topping and set aside.
2. Grate the cheese and put in the bowl of a food processor with flour, oregano, salt and pepper and pulse to combine. This can also be done by hand.

3. Add the oil and pulse until the consistency of wet sand is reached.
4. Add enough water for the dough to come together.

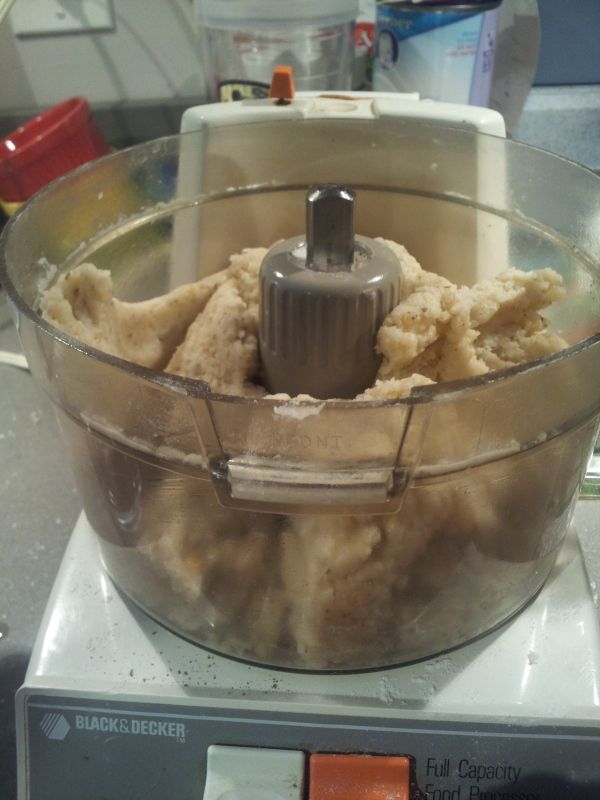
dough has come together
5. Form the dough into two disks, wrap with cling film and refrigerate for several hours or overnight.
6. Heat the oven to moderate 325°F/160°C/gas mark 3.
7. Working with a quarter of the dough at a time, either use a rolling pin or roll out in your pasta rollers to 1/8 of an inch (3 mm) thick. If you use pasta rollers, ensure the dough is well floured so as not to stick.
8. Cut the strips into cracker shapes or cut out using a cookie cutter.
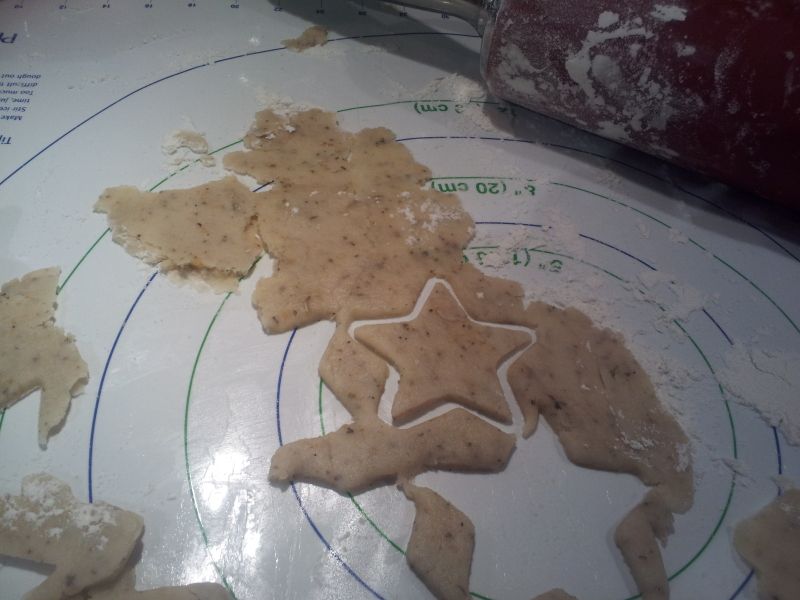
star shapes - what the birthday boy wanted!
9. Transfer to a parchment lined cookie sheet (I used my silpat) and sprinkle with the spice mixture.
10. Bake for 20-25 minutes until medium golden brown.
11. Store in an airtight container and eat within three days.
so good!!

For these crackers: the thinner you cut them, the better. They get crispier. These were really cheesy!

Cheddar, Rosemary and Walnut Icebox Crackers 

(form into a log and slice):

Servings: Approximately 48 crackers

Ingredients

½ cup (120 ml) (1 stick) (115 gm/4 oz) butter, well softened
2¼ cups (540 ml) (225 gm/8 oz) grated aged cheddar cheese (the better the cheese, the better the cracker), firmly packed
1 cup plus 3 tablespoons (285 ml) (190 gm/6oz) all-purpose (plain) flour
1 teaspoon (5 ml) (6 gm) salt
1/2 cup (120 ml) (60 gm/2 oz) finely chopped walnuts
1 tablespoon (15 ml) (1¾ gm) finely chopped rosemary


Directions:

1. Combine butter, rosemary and cheese in a stand mixer and beat well (can also be done by hand)

2. Add the flour, salt and nuts and stir to combine
3. Form the dough into two tight logs and wrap with cling film
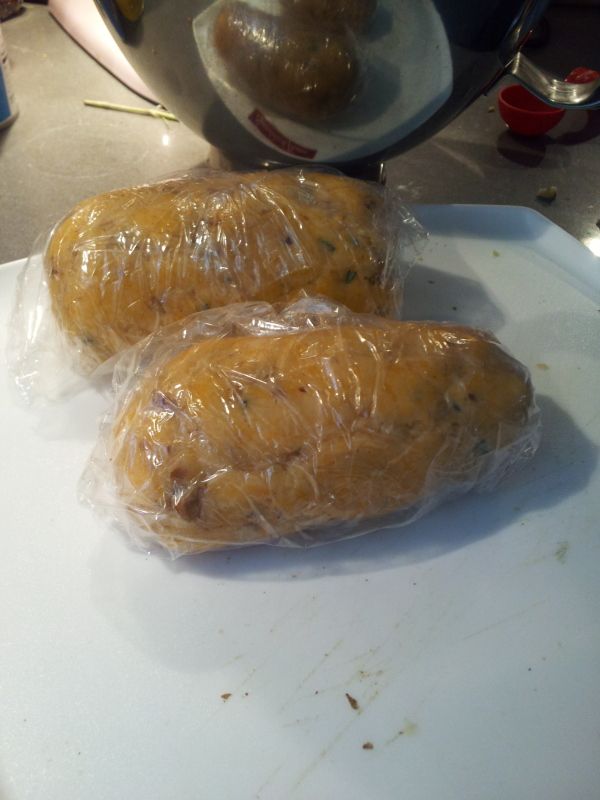
logs wrapped and ready to be refrigerated


4. Chill for at least an hour and up to several days. The log can be frozen at this point for several months.
5. Heat the oven to moderate 325°F/160°C/gas mark 3.
6. Slice a log into 5mm (1/5 inch) coins and place on a parchment lined baking sheet
7. Bake about 10 minutes until golden brown
8. Store in an airtight container and eat within three days
9. Try this recipe with different cheeses, nuts (or no nuts), and spices. Get creative!


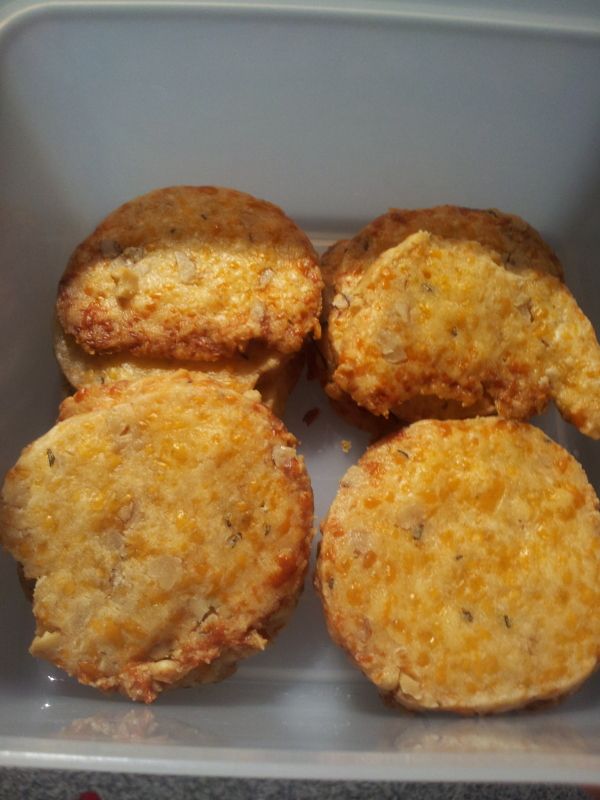
cheesy crunchy crackers


Thursday, July 26, 2012

alternaVites Kids Vitamins Review and Giveaway


There seem to be a lot of different types of vitamins for children out there. Until I was introduced to alternaVites Kids, I had no idea they came in a powdered form!  alternaVites Kids is a new potent high-quality multivitamin containing a full spectrum of essential vitamins and minerals in a unique delicious crystal powder form that melts in your mouth. Created for kids ages 4 and up, alternaVites Kids is a perfect alternative to traditional chalky chewables or sugary gummies that are high in sugar, low in nutrients and can stick to a child’s teeth.  Using a proprietary blend of ingredients, it is free of sugar, aspartame or high fructose syrup, artificial flavors and preservatives.  alternaVites Kids has also been carefully formulated with ingredients that do not contain the major food allergens (egg, milk, peanut, tree nuts, wheat, soy, fish and shellfish) and is certified kosher pareve.

alternaVites Kids sprinkled on yogurt
 alternaVites Kids is easy to eat. You can sprinkle a little at a time on the tongue or you can sprinkle it in yogurt, smoothies, puddings, etc. Above, you can see that the entire package is sprinkled on my yogurt. I found it mixed it perfectly and added a touch of the flavor. It would be a great way to hide vitamins if your child is picky! It was also fun to sprinkle on my tongue and letting it dissolve.

alternaVites Kids is available at www.alternaVites.com for $15.95 (one month’s supply/30 daily dose packets). Use code moms20 to get 20% off of your order!

 Want to win a month's supply? Easy! Just enter using the Rafflecopter form below. Entries will be verified!


a Rafflecopter giveaway


*I received a sample to review. All thoughts and opinions are my own*

Wednesday, July 25, 2012

Cheezy Ritzy Chicken Recipe

So, I made my own version of this recipe, and it s so good!!! But I forgot to take pictures (as wonderful as they are!) so I decided to make it again. But I did the chicken differently, and it shows! After the recipe i will give my tips to make this. :) This recipe is a little sweet and a little savory.


Cheezy Ritzy Chicken


Cheezy Ritzy Chicken
(based on this recipe)
Ingredients
  • 1 pound cooked chicken, cut into bite-sized pieces
  • 1 (10.5 ounce) chowder cheese soup
  • 1 (8 ounce) fat free sour cream
  • 3/4 sleeve to 1 sleeve Ritz Honey Graham crackers, crushed
  • 2 to 4 Tbs butter, melted

Directions  
  1. Preheat oven to 350 degrees.  
  2. In a medium bowl, add first 3 ingredients.  Stir.
  3. Pour into greased casserole dish.  
  4. Top with crackers.  Drizzle butter on top.
  5. Bake for 20 - 25 minutes, or until sides start to bubble up.
(Serves 4 to 6)
Cheezy Ritzy Chicken
My chicken was frozen, so i cooked it in the crock pot. However, that made it more shredded than chunky, so it soaked up more of the sauce. If you chunk and cook the chicken you can get 6 servings. The shredded chicken only yielded 4.

for the crackers, use as many as will cover the top of the dish, or more if you'd like. Ditto on the butter - I used less to save on a few calories, but I am sure it tastes better with more butter!! :D


Monday, July 23, 2012

Menu Plan Monday - Week of 7/23/12

Too tired this Monday morning to think of something to say. Because I was too tired yesterday to plan my meals this week lol. The babe is back to his crazy sleep schedule!

Monday: leftover pasta and sauce
Tuesday:  Jeff's birthday!!!! He is still deciding where to go out for his birthday (he is "sorting through his offers"), but he is thinking Moe's. (We've never been)
Wednesday: Cream Cheese Chicken (crock pot) (from last week)
Thursday:  leftover cream cheese chicken
Friday:  Pizza Casserole

I do not cook on weekends! We have a potluck to go to on Saturday. I need to find a cookie recipe for it :)

Baking:
Chocolate cake with cream cheese frosting for Jeff's birthday
Cookies.... I have no clue what recipe!


Find more menus at orgjunkie.com

Saturday, July 21, 2012

Hanna Andersson Roosevelt Field Grand Opening


Thursday night I attended the grand opening of the Hanna Andersson store at the Roosevelt Field  Mall in Garden City, NY. I had a great time! The store looked gorgeous, the staff was super nice, and we even ate delicious cupcakes from The Cupcake Corner. (Finally got the coconut I have been craving, and it was worth the wait!)

Love this train raglan shirt from Hanna Andersson
The clothes are fabulous. You can see just how well crafted they are in the stitching, material and style. The pajamas are even made with organic cotton. I loved how bright and cheerful the colors are and how wild the patterns can get. For girls, they had a variety of clothes, even several different types of dresses. Boys never have as much of a selection as girls, but they were definitely well represented at this store.

I fell in love with the sweatshirt below. It is a steal at $40! It is simple and classic, and it looked so warm and cozy. I will definitely be back to purchase it!

Hanna Andersson sells classic items, like this cozy sweatshirt
With a limited budget, I decided to get this cute turtle romper instead. It is a good example of the crazy colors and patterns that you can find at Hanna Andersson.They also have an unconditional guarantee: If you're unhappy with a product for any reason, just send it back to us and we'll refund the purchase price or replace the item. It's as simple as that. Can't beat that!

Halo sleepsacks! in size Large too!
Hanna Andersson is a great store! The clothes and staff are both awesome. And best of all, they are going to be opening a store at the Walt Whitman Mall! Cannot wait until they are closer to me!


*I was not compensated in any way to write his post!*

Friday, July 20, 2012

Red, White and Blue Cupcakes with Vanilla Buttercream and Marshmallows

Of course, on the 4th of July you HAVE to make something that is red, white and blue! Usually my SIL brings the cupcakes - being a professional cupcake baker - but she had to work on the 4th and couldn't make it to our BBQ,so I was excited to make cupcakes this time. This recipe is easy (using a mix) but time consuming. I have also included some tips and tricks to making these... so you don't have to learn the hard way like I did!

Red, White and Blue Cupcakes
based on the recipe by Skip to my Lou

Red white and Blue Cupcakes with Vanilla Buttercream and Marshmallows
1) Prepare a box of white cake mix according to directions. (Don't forget to preheat the oven!) I found one called Stars and Stripes by Pillsbury, which had red and blue sprinkles included.

divided and colored batter

2) Divide the batter into three bowls, about 1.5 cups of batter in each bowl. Color one bowl red, one bowl blue and keep the other white. You can add sprinkles here if you wish! I used Wilton's Christmas Red and Sky Blue icing color gels.

bottom right is red layer, top right has the white layer added, and the rest have all three layers

3) Layer the batter into your cupcake pans: red, white then blue. I spread it around until it covered the entire layer below it. Note that your cupcakes should be 2/3 filled. I filled mine a bit too much and they overflowed. Also, if you run out of one color or don't have enough to cover a layer, that is ok! You can make one tie dye by swirling the colors together or just layering two colors. I am a firm believer in testing what you bake, so those would make great tester cupcakes ;)

My Tie Dyed Creations in the front and back!

4) Bake according to the package directions. Allow to cool before icing. Add the marshmallows, however, if you will be serving these more than 24 hours later, wait to add them. Or else they'll get all sticky on the bottom!

This cake mix was amazing... they stayed moist in the fridge for over a week!


Vanilla Buttercream Icing with Marshmallows
Ok, I made this recipe exactly as written (other than subbing the extra vanilla extract and using whole milk instead of heavy cream) I SHOULD have made it the way i usually make icing, but I didn't. After the recipe, I'll explain what I'd do differently next time.

Easy Vanilla Bean Buttercream
Yield: 3 cups (Enough for 24 cupcakes)
Prep Time:
2½ sticks unsalted butter, softened
1 vanilla bean, halved lengthwise
2½ cups confectioners’ sugar (10 ounces)
Pinch salt
1 teaspoon vanilla extract
2 Tablespoons heavy cream
1. In a standing mixer fitted with the whisk attachment, beat the butter at medium-high speed until smooth, about 20 seconds. Using a paring knife, scrape seeds from vanilla bean into butter and beat mixture at medium-high speed to combine, about 15 seconds.
2. Add confectioners’ sugar and salt; beat at medium-low speed until most of the sugar is moistened, about 1 minute. Scrape down the bowl and beat at medium speed until mixture is fully incorporated, about 30 seconds; scrape bowl, add vanilla and heavy cream, and beat at medium speed until incorporated, about 20 seconds, then increase speed to medium-high and beat until light and fluffy, about 4 minutes, scraping down bowl once or twice.
(I know that vanilla beans can be expensive and so if you opt not to use the vanilla bean called for in the recipe, you will want to increase the amount of vanilla extract to 1 Tablespoon. You can make this and refrigerate it for up to two weeks. When you are ready to use it, allow it to come to room temperature and then re-whip it in your stand mixer to lighten it up.)
(Recipe from Cook’s Illustrated)
Layery goodness

 ~ When I make icing, I mix it with the beater blade first. I mix it all up until the fluff part at the end, then I switch to the whisk. Using just the whisk, my ingredients did not get mixed enough, and the butter taste was very prevalent. It also did not get that fluffy, and every step just took longer.

~ Using the 1 Tablespoon of vanilla was too much. I would reduce it next time.

Hope that these tips helped! The best thing about this is that you can change the colors of the layers and theme them however you want! :)


Wednesday, July 18, 2012

Radical Review Wednesday: Frizz-Ease Sheer Solution


I live on an island in New York. I live less than 5 miles from the water. My hair is wavy. So in the summer, my hair gets frizzy - especially around the hairline.  I really didn't think that there was anything I could do about it - until Frizz-Ease Sheer Solution came into my life! Look at the before and after pictures below... it is amazing!!!

Before... 24 hours of frizzies, even AFTER combing my hair!!


Frizz-Ease Sheer Solution is easy to use - shake up the formula, squeeze approx. 10 drops in the the palm of your hand and run it through damp hair. Easy! And it WORKS! Below is after 24 hours of use - including two hours running around a playground in 92 degree, 80% humidity weather. Still looks great!

After 24 hours of Frizz-Ease use - frizz free!
Be sure to check out this how-to video for achieving super-soft, stylish waves. click this link to print a coupon. Now that I use Frizz-Ease, I am looking forward to actually styling my hair in the summer!!


*I received a sample to review as part of my Bzzagent membership. All thoughts and opinions are my own*

Monday, July 16, 2012

Menu Plan Monday - Week of 7/16/12


Skipped last week, and it showed with all of the "What's for dinner?"s being thrown around. And all of the snacky and frozen meals we had last week def. showed it. So no laziness this week! here is the plan:


Monday: Pasta Casserole from the freezer (cooking chicken in the crock to shred later)
Tuesday:  Cheezy Ritzy Chicken (a recipe I "created" but didn't take pics of, so I am making it again!)
Wednesday: Pizza Quesadillas
Thursday:  leftover Ritzy Chicken
Friday:  Cream Cheese Chicken (crock pot)

I do not cook on weekends! Saturday  we are going out for Jeff's birthday, to one of the best local restaurants. Sunday will be leftovers from that meal!

Baking:
Last week I made DIY Chocolate Syrup (ok not really baking!). And it turned out pretty good!
Yesterday I made: Peanut Butter Cake Bars (dinner at MILs!)

Next week is Jeff's birthday!! He wants a chocolate cake with chocolate frosting... Anyone have any delicious recipes?

Find more menus at orgjunkie.com

Friday, July 13, 2012

Independence Day by Richard Ford Book Review

Independence DayIndependence Day by Richard Ford

My rating: 1 of 5 stars


This book was not good. The core story is decent - Frank Bascombe, man in them middle of a life something tries to sell a house, visits his girlfriend, then drives to CT to pick his trouble making son up to spend the 4th of July weekend going to sports halls of fames. The front cover states that "Frank's Independence Day turns to not as he'd planned." That is what kept me reading the book - Unfortunately, that happens on page 361 of a 451 page book!!!

What goes on in the first 360 pages? Lots and lots of nothingness. Lots and lots of words. Details, many superfluous details, including 27 pages on how Frank went from sportswriter to real estate agent. 27 pages that have NOTHING to do with the story! Frank also doesn't seem to like anyone, especially his girlfriend, and his conversations are so convoluted, full of double meanings and just don't make sense.

And by the time that action comes along on page 361 - you are cheering and happy about what happens! Finally the character gets what is deserved! It helps that every character seems fake and made up. They are totally unrelateble.

The best thing about this book is the chuckle you get of Frank using pay phones to check his answering machine!

But please, don't waste your time reading this drivel.


View all my reviews


Wednesday, July 11, 2012

Win an Amazon Gift Card

BabyGizmo.com is giving away a $100 Amazon gift card! They always have awesome giveaways, but this might be the best one yet! Enter here. Ends July 14th.


Saturday, July 7, 2012

Pinterest for Dummies WINNER!!

Ugh, I totally forgot about this giveaway!!! I am so sorry!! :(


The winner of the Pinterest for dummies book is

MELISSA B.!!!

Thanks so much for entering! I am e-mailing you now... you have 48 hours to reply :)

And a reminder - I DO check the entries so please don't say that you did something when you didn't!


Wednesday, July 4, 2012

Radical Review Wednesday: Nabisco MilkBite Bars

 Have you guys seen the commercials starring this little guy? His name is Mel ,and he is the Nabisco MilkBite bar.  He is so adorable!!! I love the commercial with him on a blind date. :) The commercials worked for me!  I eat granola bars every day, so I like trying all of the new varieties that come out, and granola bars that need to be refrigerated intrigued me.

What a MilkBite bar really looks like
Being a huge peanut butter fan, I chose the peanut butter variety. And they were DELICIOUS!! So creamy - you can tell that they are made with milk. The taste was similar to those no bake peanut butter oatmeal cookies. It seemed very indulgent. The downside is that thy are very hard to find, and for the same price as granola bars that have 8 bars in them, the MilkBite bars only have include 5 bars in a box. and 5 bars makes it more difficult to share with 2 people!

Nutrition info:
• Made with real milk
• 30% daily value of Calcium
• 5g of Protein
• Good source of Fiber and Vitamin D
• No artificial flavor, colors or preservatives
• 7g of Whole Grains per bar

For more information, check out the MilkBite Web site http://www.kraftbrands.com/milkbite/ and friend Mel on Faebook!

All of the MilkBite flavors